Sagging Gate Doors: Causes in Chattanooga Clay Soil and How to Fix Them
A gate that dragged a little last month now scrapes the ground and won't latch. If that sounds familiar, you are not alone, and the problem is probably not the gate itself. Most sagging gate doors have causes that start underground, and in Chattanooga, our clay-heavy soil and freeze-thaw winters do more damage to gates than age or weather on the wood ever will. This guide walks through how to diagnose the sag step by step, fix what you can, and know when the problem runs deeper than hinges.
This matters for landlords too. Suppose you own a duplex in East Ridge and a tenant texts a photo of a side gate stuck half-open before a move-out inspection. You need to know fast whether this is a one-hour hinge fix or a post that has shifted in the clay. The steps below tell you which one you have.
Why Sagging Gate Causes Accelerate in Chattanooga Clay
Chattanooga sits on clay-heavy soil that swells when wet and shrinks when dry. Every heavy rain, the clay around your gate posts expands. Every dry stretch, it pulls back. Add winter freeze-thaw cycles and the posts that hold your gate are riding a slow-motion elevator, up, down, and sideways.
A gate is the one part of a fence that hangs from a single post. All the weight pulls on that hinge post as leverage. When the clay shifts even slightly, the post leans toward the gate, the far corner drops, and the latch stops lining up. The gate did not fail; the ground moved.
That is why the common sagging gate doors causes break down into two groups: problems with the gate itself, and problems with the ground and posts. The fixes are different, so figure out which one you have before you buy anything.
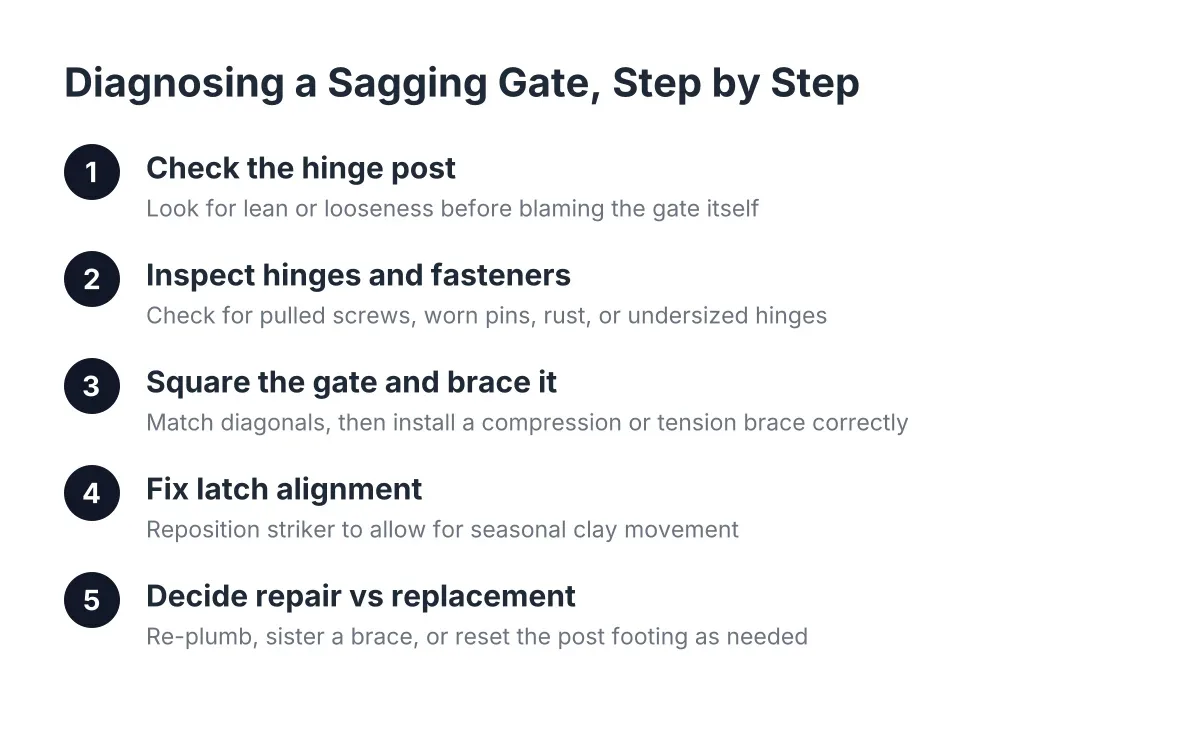
Step 1: Check the Hinge Post Before You Blame the Gate
Stand at the latch side and look down the hinge post. Is it leaning toward the gate? Put a level against it. If the post is out of plumb, the gate can be in perfect shape and it will still drag.
Next, grab the top of the hinge post and push and pull on it. If it rocks in the ground, the footing has failed or the clay has worked it loose. No hinge adjustment will fix a loose post for long.
A common installation mistake makes this worse. Some installers fill concrete only to a couple inches below grade, then top the hole with dirt or sod. That traps moisture right where the post meets the ground, and in our wet seasons that spot rots or rusts first. If a wood post snaps right at ground level, this is usually why.
If the post is solid and plumb, good news. Skip to Step 2, because the problem is in the gate.
Step 2: Inspect the Hinges and Fasteners
With the post ruled out, look at the hardware. Hinges carry the full weight of the gate every time it swings, and they fail in predictable ways:
- Screws pulled partway out of the post or gate frame
- Hinge pins worn oval so the gate drops before it swings
- Rust on the barrel or plate, especially near the bottom hinge
- Hinges that are too small or too few for the gate's weight and width
- On vinyl gates, screws stripped out of hollow uprights
Tighten or replace loose screws with longer ones that bite fresh wood. If the holes are stripped, fill them with glued hardwood dowels and re-drive the screws. On vinyl gates, hollow uprights often cannot hold screws under load; a reinforcing channel insert inside the upright gives the screws something solid to grip and makes the frame far more resistant to pulling apart.
If the hinges themselves are worn or undersized, replace them with heavier hardware rated for the gate's weight. A wide wood gate on two light hinges will sag again no matter how square you make it.
Step 3: Square the Gate and Brace It the Right Way
Take a tape measure and check both diagonals of the gate frame, corner to corner. If the measurements differ, the gate has racked out of square. The latch-side bottom corner has dropped, which is the classic sag.
Pull the gate square again by clamping it or racking it on sawhorses until the diagonals match. Then lock that shape in with a brace. Here is where many DIY fixes go wrong, because there are two kinds of braces and they run in opposite directions:
- A rigid wood or metal brace works in compression. It runs from the bottom hinge-side corner up to the top latch-side corner.
- A cable or turnbuckle kit works in tension. It runs the opposite way, from the top hinge-side corner down to the bottom latch-side corner.
Install a rigid brace in the cable direction and it will twist under load and speed up the sag instead of stopping it. Match the brace type to the direction, snug it, and re-check the diagonals before you let the gate hang free.
Step 4: Fix the Latch Alignment, and Plan for Movement
Once the gate swings level, the latch may still miss its striker. Before you move hardware, understand that in clay soil the ground will keep shifting season to season. A latch set with zero margin will miss again by next winter.
Therefore, reposition the striker with movement in mind. Mounting the striker so the latch bar catches near the top of the striker's range leaves room for the gate to settle slightly and still catch. It is a small detail that separates a fix that lasts a season from one that lasts years.
For landlords, this step is worth the extra ten minutes. Say you manage four rentals around Hixson and Red Bank; a latch that self-aligns through seasonal movement means fewer tenant calls about a yard gate that will not secure a dog. Lease requirements for a secured yard make this a liability issue, not just a convenience.
Step 5: Decide Whether the Post Needs Repair or Replacement
If Step 1 showed a leaning or loose post, the fixes above are temporary at best. In Chattanooga clay, a failed hinge post has a few repair paths:
- Re-plumb and re-tamp a post that leaned but did not rot or rust
- Sister a steel brace or new post section alongside a wood post broken at grade
- Dig out the old footing and set a new post with concrete crowned above grade so water sheds away instead of pooling at the post
One point worth knowing: dumping more concrete in the hole does not automatically make a post more stable. Depth, drainage, and how the concrete is finished at grade matter more than volume, especially in clay that holds water against the footing.
An interim repair that preserves the existing concrete footings can also make financial sense. It keeps the gate working now, and the cost effectively rolls toward a future full replacement with steel posts when the budget allows. For a rental owner spreading repairs across several units, that staged approach often beats replacing everything at once.
When Sagging Gate Causes Point to Deeper Damage
A single dragging gate is usually a hinge, brace, or post issue you can trace with the steps above. However, some patterns point past gate repair toward the fence line itself. Watch for these:
- Several posts along the run are leaning, not just the hinge post
- The gate was fixed before and sagged again within a year
- Wood posts are soft or hollow at ground level when you probe them
- An automatic gate operator is straining, clicking, or faulting because the gate no longer tracks level
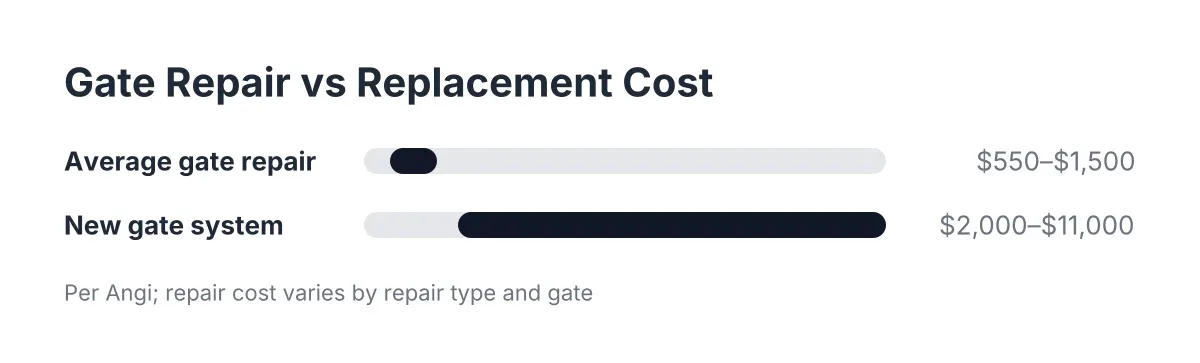
Automatic gates deserve special caution. A sagging leaf forces the operator to drag weight it was never set up for, and that burns out motors and arms. According to Angi, automatic gate repairs average $900, typically ranging from $550 to $1,500 depending on the repair type and gate material. Fixing the sag early is cheaper than replacing a strained operator later.
There is also a limit to DIY here. If the hinge post supports an automatic gate, sits in a failed footing, or anchors a long heavy leaf, bring in a professional for residential gate repair. Setting a post that will stay plumb through Chattanooga's wet springs and freeze-thaw winters depends on footing depth and drainage details that are easy to get wrong once and expensive to redo.
The Short Version
Sagging gate doors have causes that fall into two buckets: hardware and framing you can see, and posts and soil you mostly cannot. Check the post first. Then tighten or upgrade hinges, square the gate, brace it in the correct direction, and set the latch with seasonal movement in mind. If the post itself has moved in the clay, fix the footing or the sag will come back, no matter how good the gate looks.
If you need automatic gate installation and repair, Chattanooga Fence Builders can help.
Prefer to talk it through? Call (423) 615-8548 — a quick call is usually the fastest way to get a straight answer for your situation.