Wrought Iron Gate Installation: Automatic Openers and Access Control Options
A heavy iron gate looks great until it stops moving. If you are planning wrought iron gate installation, the gate itself is only half the project. The opener, the power, and the way people get in and out matter just as much, especially if you ever want to add an automatic gate opener later. This guide walks through the full process of automatic gate opener installation step by step, from layout to access control, so your gate works on day one and keeps working through Chattanooga's clay soil and freeze-thaw winters.
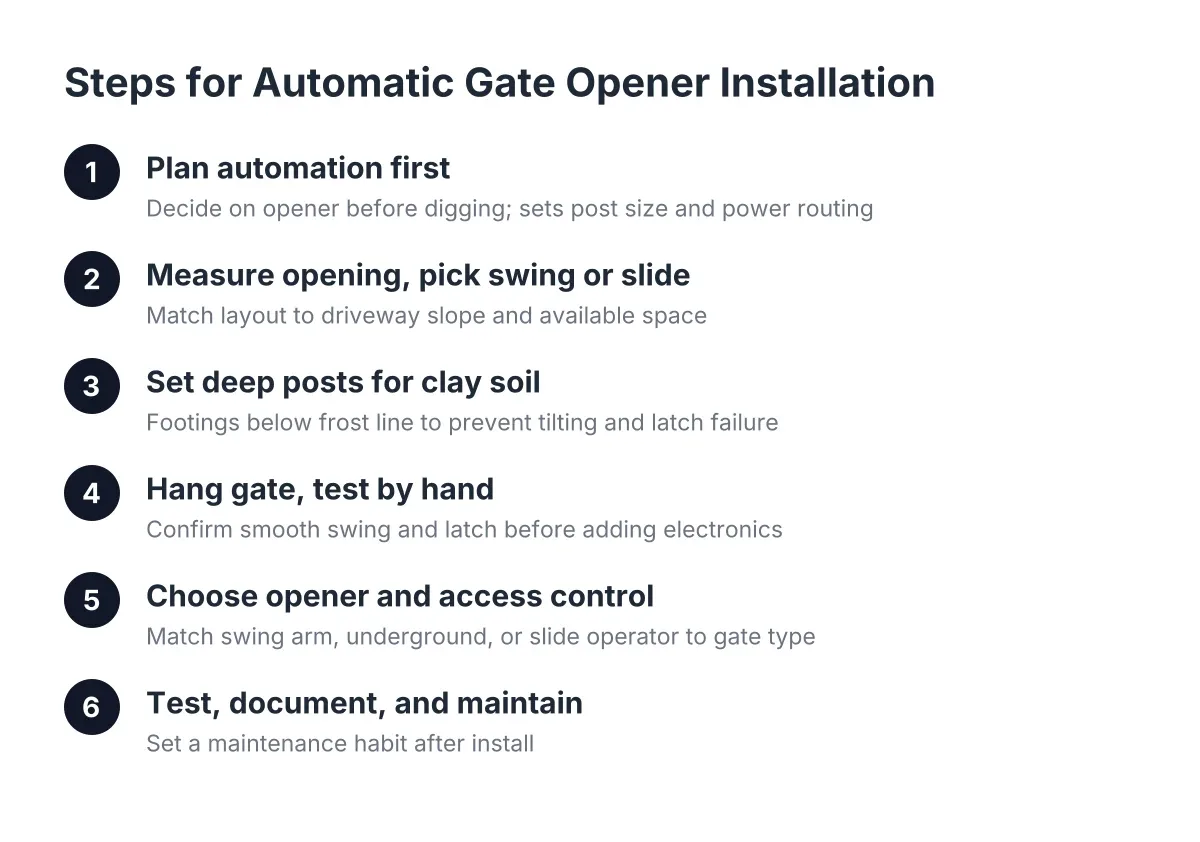
Follow the steps in order. Decisions made early, like post depth and conduit placement, lock in what you can do later. Skipping them is why so many homeowners end up searching "gate opener not working" two years after the install.
Planning Automatic Gate Opener Installation: Step 1
Make the automation decision before anyone digs a hole. This is the single choice that shapes everything else: post size, footing depth, power routing, and even which way the gate swings. Retrofitting an opener onto a gate that was never planned for one costs more and works worse.
An iron gate is heavy compared to a wood fence or vinyl fence gate. That weight is why wrought iron pairs so well with automation; the gate does not warp or sag the way wood can. But it also means the opener, hinges, and posts must be sized for the load from the start.
You do not have to buy the opener today. However, if there is any chance you will want an automatic gate opener within five years, plan for it now:
- Choose a swing gate or sliding gate layout that fits your driveway slope
- Size the posts and footings for the gate weight plus an operator arm
- Run electrical conduit to the gate posts while the trench is open
- Leave room beside the drive for a keypad pedestal or intercom
Running empty conduit during wrought iron gate installation costs little. Trenching your finished driveway apron later costs a lot.
Step 2: Measure the Opening and Pick Swing or Slide
Measure the clear opening between posts, not the driveway width. A driveway gate needs room for the gate leaf plus hinge hardware plus latch clearance. For a double swing gate, each leaf covers half the opening, which keeps individual leaf weight down and makes future automation easier.
Then decide swing or slide based on your site:
- Swing gates suit flat or gently sloped drives with room for the gate to open inward. They are simpler to automate and easier to open by hand during a power outage.
- Sliding gates suit short or steep driveways where a swinging leaf would hit the slope or the street. They need clear run-off space along the fence line.
Chattanooga lots on hillsides often rule out an inward swing because the drive climbs right behind the gate line. Check this before you order anything. A gate that drags the pavement every winter is a gate you will be calling about for gate repair.
Step 3: Set Posts Deep Enough for Clay Soil and Frost
Set gate posts in concrete footings that reach below the frost line, and go deeper and wider than you would for a standard fence post. Gate posts carry live, moving weight on one side. In Chattanooga's clay-heavy soil, shallow footings heave and tilt as the ground freezes, thaws, and swells with seasonal rain.
A tilted post is the hidden cause behind most "gate won't latch" and "gate dragging on the ground" calls. The hinge side leans an inch, the latch side drops, and suddenly the gate scrapes or the latch misses its striker. Fix the footing at install time and you avoid that whole category of gate repair.
In addition, expect some settling no matter how careful the dig is. One practical hedge: mount the latch striker near the top of the latch's adjustment range. As the ground shifts over the years, the gate drops into the latch's working zone instead of out of it. Setting the striker before final hanging also helps position the gate correctly, since the striker location self-aligns the latch side.
Let the concrete cure fully before hanging the gate. Hanging a heavy iron leaf on green concrete twists the post before the footing can resist it.
Step 4: Hang the Gate and Prove It Works by Hand
Hang the gate on adjustable hinges and get it swinging freely before any electronics enter the picture. Check three things:
- Even gap along the latch side from top to bottom
- Consistent ground clearance across the full swing, including the high spot of a sloped drive
- Smooth latch engagement with no lifting or shoving
A gate that binds by hand will fail under an opener. Automatic gate operators push with steady force; they do not jiggle, lift, or slam the way a person does. Every manual flaw becomes an opener fault, and the opener gets blamed for a hinge problem.
This is also where a quality wrought iron fence and gate earn their keep. Iron leaves hold their shape, so once the geometry is right it tends to stay right, unlike wood gates that need seasonal anti-sag adjustments.
Options for Automatic Gate Opener Installation
Match the opener type to the gate style and weight, not the other way around. The main options for residential wrought iron gate installation in 2026:
- Swing arm operators bolt to the post and push or pull the leaf. Good for single and double swing gates on level drives.
- Underground operators hide in a foundation box at the hinge. Cleanest look for a decorative iron gate, but they cost more and need good drainage, which matters in our wet springs.
- Slide gate operators drive a chain or gear rack along the gate. The standard choice for sliding gates.
Also decide on power. Hardwired AC is the most reliable for daily use. Solar kits work for remote gates with light traffic but can lag in a cloudy Tennessee winter. Battery backup is worth specifying either way, so a storm outage does not trap your car behind your own gate.
If you are automating an existing iron gate instead of installing new, have someone verify the posts and hinges can take the operator load. Not every older gate can be automated safely, and that is a judgment call best made on site by a professional.
Step 6: Pick Access Control That Fits How You Live
Choose how the gate opens for family, guests, and deliveries before the installer leaves. The opener is the muscle; access control is the brain. Common options, roughly from simplest to most capable:
- Remotes and in-car transmitters for the household
- Wireless keypads with codes for family, cleaners, or dog walkers
- Smartphone control through Wi-Fi or cellular modules, so you can open the gate for a delivery from work
- Vehicle exit sensors buried in the drive so cars leaving never get stuck inside
- Video intercoms at the gate pedestal so you can see and talk to visitors
Safety devices are not optional. Photo eyes or safety edges stop the gate from closing on a car, a kid, or a pet. Any opener installed to current standards should include them, and they are the first thing to check when an automatic gate starts behaving strangely.
Step 7: Test, Document, and Set a Maintenance Habit
Run the full system before calling the job done. Open and close from every device: each remote, the keypad, the phone app, and the exit sensor. Block the photo eye mid-close and confirm the gate reverses. Pull the power and practice the manual release, because the first time you use it should not be in the rain at 7 a.m.
Then write three things down and tape them inside a kitchen cabinet: the opener brand and model, the keypad master code location, and the manual release steps. For example, suppose a homeowner in East Brainerd comes home to a gate that just clicks and will not move. In that scenario, knowing the manual release gets the car out in two minutes; not knowing it means an after-hours service call. According to Angi, automatic gate repairs average $900, and after-hours failures can add $150 to $200 in emergency service fees.
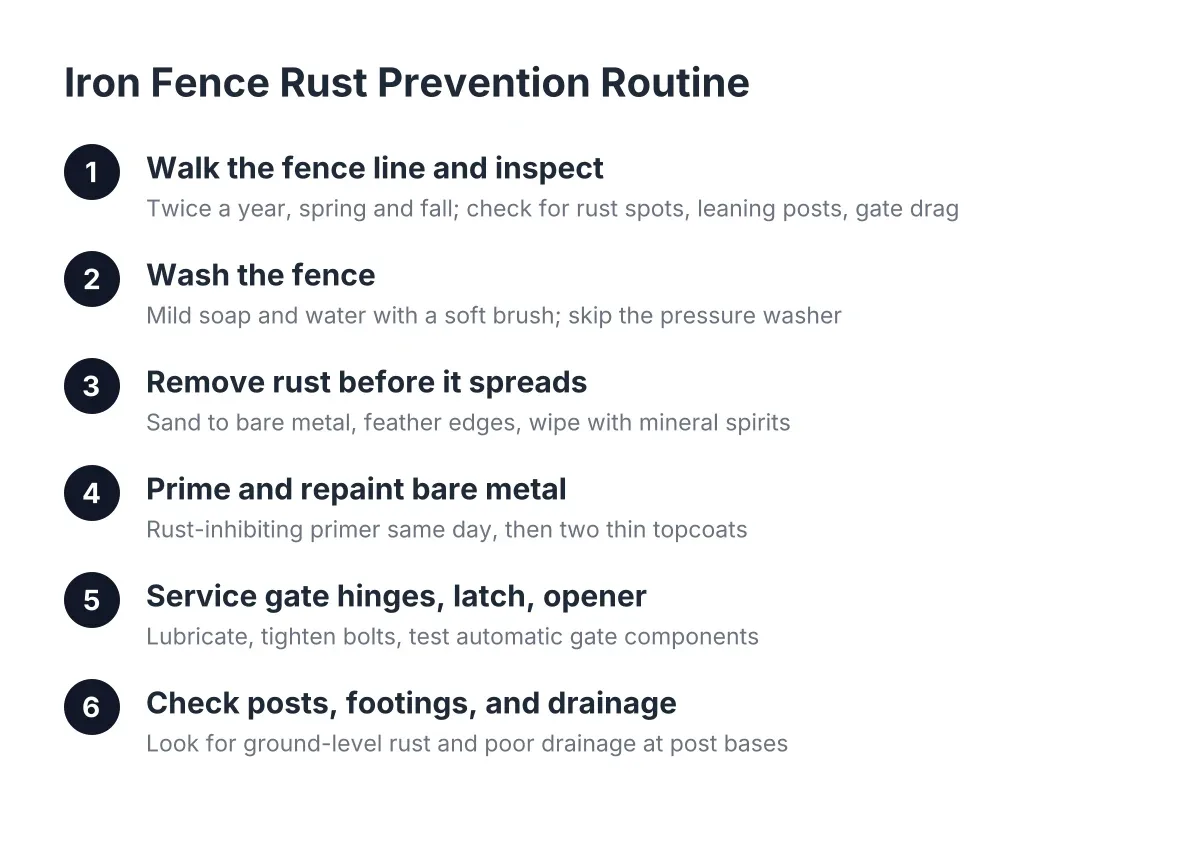
Finally, keep up light maintenance: hinge lubrication twice a year, a quick rust check on welds, and a latch alignment look each spring after the freeze-thaw cycle. If a repair quote on an aging system ever climbs past half the cost of a new one, Angi's guidance is that replacement becomes the better investment. A well-planned installation pushes that day many years out, which is the whole point of doing these seven steps in order.
If you need automatic gate installation and repair, Chattanooga Fence Builders can help.
Prefer to talk it through? Call (423) 615-8548 — a quick call is usually the fastest way to get a straight answer for your situation.